How to tie a knot that adjusts
(loop with a sliding end)
The instructions below are for tying an “adjustable” knot with your wrap. You will need it in several carries, in order to wear your baby comfortably and then “tighten” the knot as much as needed so that your wrap is as taut as it should be.


1. Rest the center of your wrap on your shoulder and fold it in half, so that the folded part is at your elbow and the open ends are close to your neck. The two ends will hang in front of and behind your body.


2. Grab the one end behind your back and bring it to the front, under your armpit and in front of the other end.


3. Wrap this end around the one that hangs in front of you and pull it out from inside and towards the opposite side.


4. Hold this end downward with one hand and with the other guide it towards the other side, forming a loop.


5. Wrap this end again around the part of the wrap that hangs in front of you and pass it from behind through the loop you formed in the previous step.


6. Pull this end so that it tightens well and all the parts of your knot become taut.
7. Make sure that the knot works: by holding the vertical part in front of you steady you can push the knot upward (thereby making the size of your wrap smaller).


8. Or you can push the knot downward, thereby making a large opening in front of you.


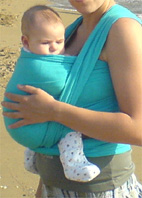
9. In reality you have made a sling! You can wear your baby there with their legs out, or find the opening in front of you (from the fold you made in steps 1 and 2) and wear your baby with their legs inside.
You can also see the tying of this knot with a long sarong in the video below:

Video: How to tie a knot that adjusts
so that you make an improvised soft carrier (7.3 MB)
back: Instructions with wrap