
Alternative ways to tie your wrap or mei tai
Below you’ll find different ways to tie the straps of your mei tai or the ends of your wrap (when you use it to carry your baby high on your back with the “back carry” method).
A. Tying at the front of the chest

1. Under the armpits. Keep the straps taut and pass them straight under your armpits. In front of you they will hang vertically below your shoulders, as if you were wearing a backpack.
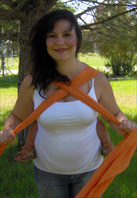
2. Crossed high. Cross the straps high, above your chest, and then pass them under your armpits.
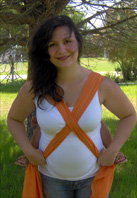
3. Crossed low. Cross the straps low, in front of your chest, and then pass them around your waist.
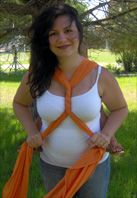
4. Crossed with a twist. Cross the straps in front of your chest, twist them together two or three times (or as much as feels comfortable to you) and then pass them around your waist.


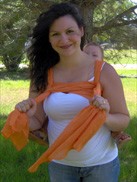

Having applied the 1st method (under the armpits), and after crossing the straps behind your back (below the baby’s bottom), bring the straps to the front again and “catch” one of them between your knees to keep it taut.
Then, take the other strap and pass it through the vertical section below your shoulder and pull it firmly outwards.
Do the same with the other strap (the one you were holding between your knees until now) and tie the ends in a knot in front of you, above your chest.
This method is especially suitable if your baby is big or heavy, as it takes a lot of the weight away from your shoulders and distributes it evenly across the front of your chest.
Ideal when: your baby is big or heavy — it takes a lot of the weight away from your shoulders and distributes it evenly across the front of your chest.
B. Tying at the back

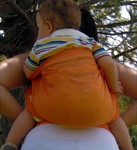
Keeping the straps well taut, guide them over the baby’s legs to your back and cross them there, below the baby’s bottom.
Now take the crossed ends and bring them to the front, this time passing them under the baby’s legs. Tie a knot in front of you.
(Note: With this method, a horizontal “8” is formed below your baby, and your baby’s little legs pass through its openings.)
Note: With this method, a horizontal “8” is formed below your baby, and your baby’s little legs pass through its openings.

2. Crossed with a twist (Lexi twist)
Keeping the straps well taut, guide them around the baby’s waist to your back and cross them there, on the baby’s back. Then twist them once around each other.
Now take the crossed ends and bring them to the front, passing them under the baby’s legs. Tie a knot in front of you.
(Note: With this method you avoid the “red marks” that may appear on your baby’s bare little thighs in summer if you use the 1st method.)
Note: With this method you avoid the “red marks” that may appear on your baby’s bare little thighs in summer if you use the 1st method.