
High on the back (back rucksack method)
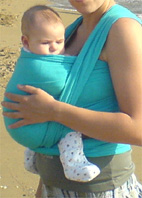

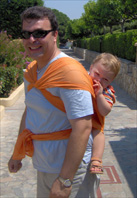
This position is suitable for babies who can comfortably support their own head (around 3 months).
Note: In the photos below I am already 6.5 months pregnant and my Vasilis weighs 15 kilos! Yet this is still one of the most comfortable positions I use to carry my baby!
The Wrap I use in these photos is a woven fabric, 4.5 metres long and about 70 centimetres wide. This width is the minimum required for this position, so do not try it with a narrower Wrap! However, a shorter fabric could be used (2.5 to 3 m is enough for this position). Once you are done, be careful not to leave too much fabric hanging in front of you that could get tangled in your legs; wrap it around yourself once more if needed!
1. Put the baby on your back in whatever way suits you best. The child should be high up on your back (able to kiss your neck), especially if it is a small baby.
2. The recommended way to put the child on your back in this position is the “Santa Claus” method, since this brings the child straight to the right height and you already have the Wrap around it.
3. Take your Wrap and spread it over your baby so that it covers it from the armpits to the feet. Stretch the fabric towards the floor, holding your baby tightly so that it rests well against your back.
4. Stretch the Wrap well over your baby’s back and bring it under its bottom towards your chest. Attention: Enough fabric must reach under the baby’s bottom and gather there. If the fabric barely reaches the bottom, your Wrap is not wide enough for this position!
5. Take the lower edge (the one under the baby’s bottom) and bring it from the inside, close to your neck, so that it stays stretched. If it suits you, you can twist the fabric a few times on your shoulders (forming a “rope” at that spot) to maintain this tension.
6. Do the same (step 5) on the other side too. Then grip both ends firmly and tension them alternately, to make sure your baby rests well against your back and no part of your Wrap is loose.
7. Always keeping the ends and all the fabric stretched, guide the ends under your armpits towards your back.
8. Pass the straps over your baby’s legs back to your back.
(see alternative tying method)
9. Cross the ends there, under the baby’s bottom, and pass them under its legs this time, guiding them to the front of your waist. (see alternative tying method)
10. Tie a knot there and you are ready for a walk!
The “back rucksack” position is one of the most comfortable and truly very quick methods for carrying your baby!
My Rea is only 19 days old in this photo. She cannot hold her head yet, but I have rolled up the fabric behind her neck so that it supports it. I also carry her very high, so that I can hear her and feel her breathing on my neck.
This is how one can carry even a newborn baby in this position. It would still be a good idea, the first time you try it, to have someone with you watching your baby at every step!
Note: The smaller the baby you carry in this position, the higher up on your back you should place it. A small baby should be able to kiss the back of your neck and rest on your shoulder blades. See how here I have tied the ends high, above my chest, for extra safety.
Older children, like my Vasilis in these photos, may feel more comfortable lower down, with their legs open and their bottom lower than their knees. Mum and baby, we walk in the sun wearing our hats! Rea is 7 months old and the Wrap is a cotton gauze!
Note: For this position an elastic/stretchy fabric/Wrap could NOT be used, because many children (especially those older than 6 months) tend to lean backwards. Although there are variations of this position that address this “problem”, it is important that the fabric you use is woven (not stretchy) in order to achieve the “tension” required at the top part.
back to: Instructions with a Wrap